
One of the must-have accessories that I’d heartily recommend for any off-roader build is a good light bar. But, for folks who prefer the DIY route, how do you mount, install, and wire a light bar on your bumper?
Thankfully, mounting a light bar on your bumper is pretty easy. Even for someone who’s never done this before, it’s a straightforward process to follow. First off, it’s a good idea to disconnect the car battery.
Then, visualize the placement of the lightbar and think about optimizing its placement, before looking at what mounting options you have. Brackets and mounts vary between plastic and metal car bumpers.
Once you’re done mounting it, you can finally begin wiring in the light bar, by routing all the cables. And, connecting it to a power supply on your car, installing an on/off switch, and you’re just about done!
With this in mind, here’s a quick guide that I’ve put together to show you just how easy it is to get started and mount a light bar on your bumper…
- Step 1: Choosing a good light bar
- Step 2: Disconnect your 12V battery
- Step 3: Position & align the light bar
- Step 4A: Mounting on plastic bumpers
- Step 4B: Mounting on steel bumpers
- Step 5: Routing all the wires
- Step 6: Connect the wires to a power source
- Step 7: Install an on/off switch
Step 1: Choosing The Right Light Bar For Your Build
First things first, you’ll need to find the right light bar for your vehicle. In so doing, you’ll need to consider factors like the size, type (LED, Halogen, etc.), and the intensity of the light bar that you’ll be installing.
Additionally, make sure that it fits the dimensions of your car’s bumper. You’ll also need basic tools like a drill, screws, wiring kit, and possibly a metal bracket. This all depends on your vehicle bumper’s material:
- Size and Fit: Measure the area on your bumper where you plan to install the light bar. Ensure the light bar’s length and depth are compatible with these dimensions. A light bar that’s too large can otherwise hinder the aerodynamics and aesthetics of your car, while one that’s too small might not provide sufficient illumination.
- Type of Light: Other than that, LED light bars are popular due to their durability, energy efficiency, and brightness. Halogen lights are a good alternative. They offer a warmer light at a lower cost, but with higher energy consumption and less durability. Consider your driving conditions and personal preference when choosing.
- Light Intensity: The brightness of any light source, such as your new light bar, is measured in lumens. A higher lumens rating means a brighter light, which is essential for off-road or rural night driving. However, ensure that your light bar complies with local road and safety regulations regarding what brightness is allowed on the road.
- Tools Needed: For the installation and wiring process, prepare tools such as a drill (with appropriate bits for metal or plastic), screws, a wiring kit, and possibly a metal bracket or mounting kit. That bracket is particularly important for plastic bumpers to distribute the weight and stress evenly.
Step 2: Safety Considerations – Disconnect The Battery
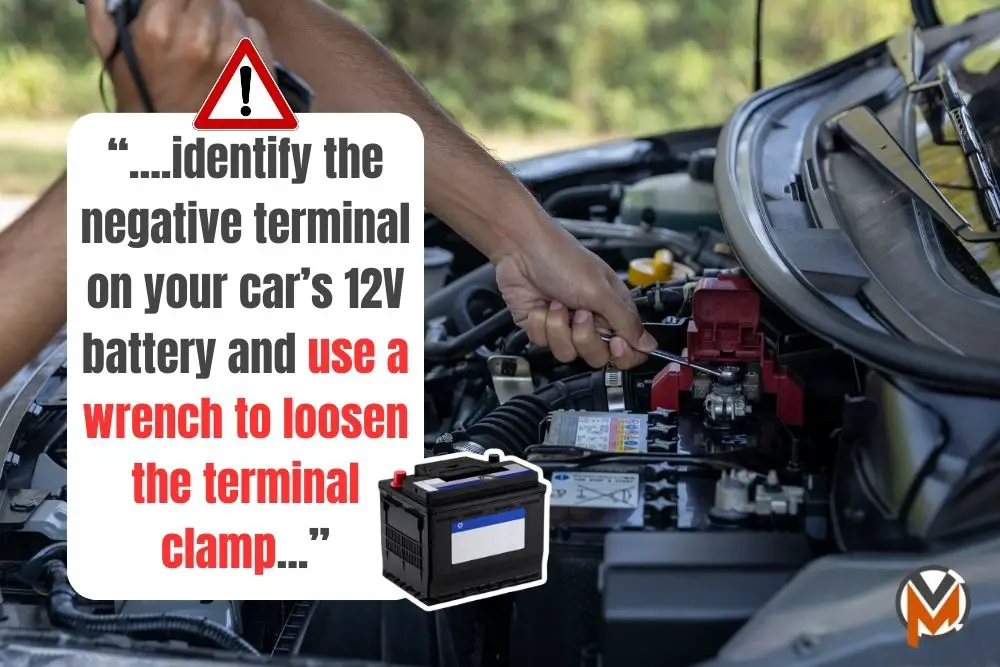
CAUTION!: Anytime you’re working on electrical components and electronics on a car, it’s always a good idea to disconnect your car’s battery, to minimize the risk of a short-circuit or electrocuting yourself.
To do this, start by locating your car’s 12V battery and identify the negative terminal. The latter is usually marked with a minus (-) sign or if it’s black in color. Now, grab a wrench to loosen the terminal clamp.
Then, you can carefully remove it from the battery post. This step is crucial to prevent any electrical shorts or hazards while working on your electrical system. Once you’re done, you can reconnect them again.
Step 3: Properly Position, Adjust, & Align The Light Bar
Before we proceed any further with mounting, installing, or mounting that light bar on your bumper, we’ll have to consider the positioning of the light bar:
- Visualizing Placement: A neat little trick I’ve learned is to use some masking tape to outline the proposed position of the light bar on the bumper. This non-permanent method allows you to adjust the placement as needed. And, make sure that you’re wary of where it’ll go afterward.
- Checking for Obstructions: Ensure that your light bar does not obstruct the vehicle’s grille, air intake, or any other essential components. Moreover, the placement should not impede airflow to the radiator. Or, block the vehicle’s headlights.
- Aiming for Maximum Coverage: Ideally, you should position the light bar to ensure it provides the widest and most effective light spread. This might involve some adjustments and repositioning. So, you might as well take your time and make sure it’s positioned right.
Step 4A: Mounting The Light Bar On Plastic Bumpers
Here, we’ll specifically mention the mounting process and steps for plastic bumpers, so if you have steel bumpers on your car, skip ahead to Step 4B. Otherwise, if you have a plastic bumper:
- Using a Mounting Bracket: To mount the light bar securely and safely, make sure you select a bracket designed for your specific vehicle model or a universal bracket that can be adjusted to fit. The bracket should be sturdy enough to support the weight of the light bar – some light bars are pretty heavy!
- Identifying Reinforced Points: Look for any areas on the bumper that are structurally reinforced, such as where the bumper attaches to the vehicle’s frame. These points can handle additional weight and stress. As such, you should be careful to not just mount a heavy light bar on parts of your plastic bumper covers that have little to no structural reinforcements.
- Attaching the Bracket: To attach the aforementioned brackets, use some bolts and nuts that are suitable for plastic, and won’t cause damage. If that bracket requires drilling, make sure to drill carefully to avoid cracking the plastic. Once you’re done, it’s wise to seal up any drilled holes with silicone to prevent water ingress.
Step 4B: Mounting The Light Bar On Steel Bumpers
If your car instead has steel or metal bumpers and not plastic bumpers… The processes for mounting that light bar do vary slightly, since you’re mounting it on steel and not plastic. Here’s what you need to do:
- Direct Mounting: If your vehicle’s bumper has pre-existing holes, align the light bar’s mounting holes with these. If not, mark the drilling points, and ensure that they are evenly spaced and aligned. This is crucial to ensure that you can get a firm, secure, and reliable mounting point.
- Drilling and Sealing: Once you’re ready to start drilling, use a metal drill bit to create the mounting holes. While you’re doing that, make sure that you also apply some rust-preventive sealant around the holes to prevent any water ingress and corrosion.
- Securing the Light Bar: With those mounting holes drilled, grab some stainless steel screws and bolts to attach the light bar, ensuring a firm and secure fit.
Step 5: Routing The Wires For The Light Bar

With the light bar now safely mounted on your car’s bumper, it’s time to wire it. This will allow power to be routed back to the light bar to power it, once you’ve connected it to a suitable power supply.
First up, let’s get into the specifics of routing and wiring in the cables for the light bar:
- Planning the Route: Identify a path through your car from that light bar to your battery that avoids hot engine components, sharp edges, and other moving parts like the steering assembly. I’d highly suggest that you take your time with this step. And, make sure that the wiring loom has not only been routed safely, but that you also secure the wires.
- Securing the Wiring: Speaking of, use some cable ties to fasten the wiring along your car’s existing wire looms or secure points. Ensure the wiring is not dangling or likely to be snagged. This is particularly vital for parts of a vehicle that move around. These wires could easily get snagged between your throttle cable, steering linkage, and so on.
Step 6: Connecting The Wires To A Power Source
Now, we can look at connecting the light bar to a suitable power supply and source:
- Installing a Fuse and Relay: To begin, you’ll have to connect the positive wire from the light bar to a relay. And then, from the relay to your battery through a fuse. The relay acts as a switch, allowing you to control the light bar without overloading the switch with a high current. That fuse is pretty important, as it protects the electrical system from potential overloads or short circuits.
- Grounding the Light Bar: Next up, you’ll need to move toward connecting the negative wire from the light bar to a grounding point on your car’s frame or chassis. This should be a clean, paint-free metal surface.
Step 7: Installing A Switch To Control The Light Bar
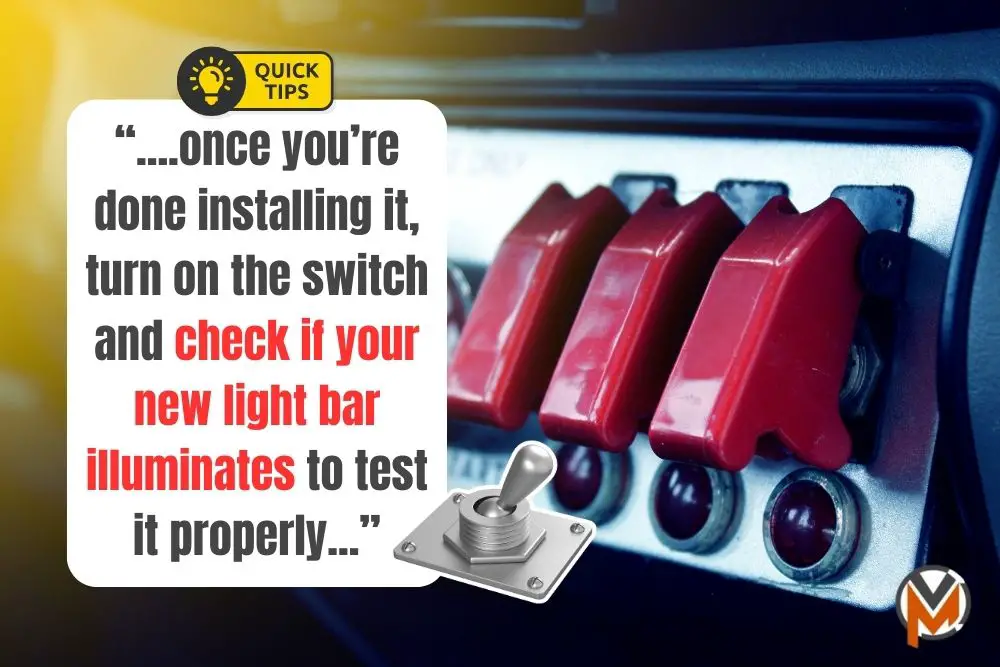
Of course, to turn on or off that new light bar of yours, you’ll need to install a simple on/off switch. Here’s how you can install a switch to control the light bar:
- Choosing a Location: The switch should be within easy reach but not where it can be accidentally engaged. Common locations where you could mount the switch include the dashboard, center console, or near other vehicle controls.
- Mounting the Switch: Once you’ve figured out where you want the switch to be installed on, drill a hole to fit the switch. And, if necessary, and secure it in place. Connect the switch between your light bar and the relay, ensuring all connections are tight and secure.
Once the installation process has been completed, reconnect your battery and test the light bar. Turn on the switch and check if the light bar illuminates properly, and that it’s mounted securely and firmly.
If it doesn’t work, recheck all connections, the fuse, and the relay. Ensure the light bar is aimed correctly for optimal lighting and adjust if necessary. The electrics are often the cause of failure, so check them.