
- What is an Evap Canister Vent Solenoid?
- Symptoms of a Faulty Evap Canister Vent Solenoid
- Repair an Evap Canister Vent Solenoid
- Replacing Your Evap Canister Vent Solenoid
- Types of Evap Canister Vent Solenoids
- Installing an Evap Canister Vent Solenoid
- Troubleshooting Common Problems
- OEM vs Aftermarket Replacement Part
- What You Need to Know Before Purchasing
What is an Evap Canister Vent Solenoid and How Does it Work?
An Evap Canister Vent Solenoid is a device used in modern vehicles to control the flow of fuel vapors from the evaporative emission (EVAP) canister. The EVAP solenoid is typically located near the EVAP canister and is connected to it via a vacuum hose.
It works by opening and closing a valve that controls the flow of fuel vapors from the EVAP canister into the intake manifold, where they are burned off during normal engine operation. When the engine is running, an electric current passes through the solenoid, causing it to open and allow fuel vapors to pass through.
When there is no current passing through, or when there is insufficient pressure in the system, then it will close and prevent any further vapor release. This helps reduce emissions by ensuring that only necessary amounts of fuel vapor are released into the atmosphere. Additionally, this helps maintain proper air/fuel ratios within an engine’s combustion chamber for optimal performance.
Common Symptoms of a Faulty Evap Canister Vent Solenoid
A faulty evaporative (EVAP) canister vent solenoid can cause a variety of symptoms in a vehicle. The most common symptom is an illuminated check engine light, which indicates that the vehicle’s computer has detected an issue with the EVAP system. Other symptoms may include difficulty starting the engine, rough idling, and poor acceleration.
In some cases, with the symptoms of a bad charcoal canister, fuel odors may be present inside or outside of the vehicle due to a leak in the EVAP system. If any of these symptoms are present, it is important to have the EVAP system inspected by a qualified technician as soon as possible to prevent further damage to other components in the system.
How to Diagnose and Repair a Malfunctioning Evap Canister Vent Solenoid
Diagnosing and repairing a malfunctioning Evap Canister Vent Solenoid can be a daunting task for the average car owner. However, with the right tools and knowledge, it is possible to diagnose and repair this issue without having to take your vehicle to a mechanic.
This guide will provide step-by-step instructions on how to diagnose and repair a malfunctioning Evap Canister Vent Solenoid:
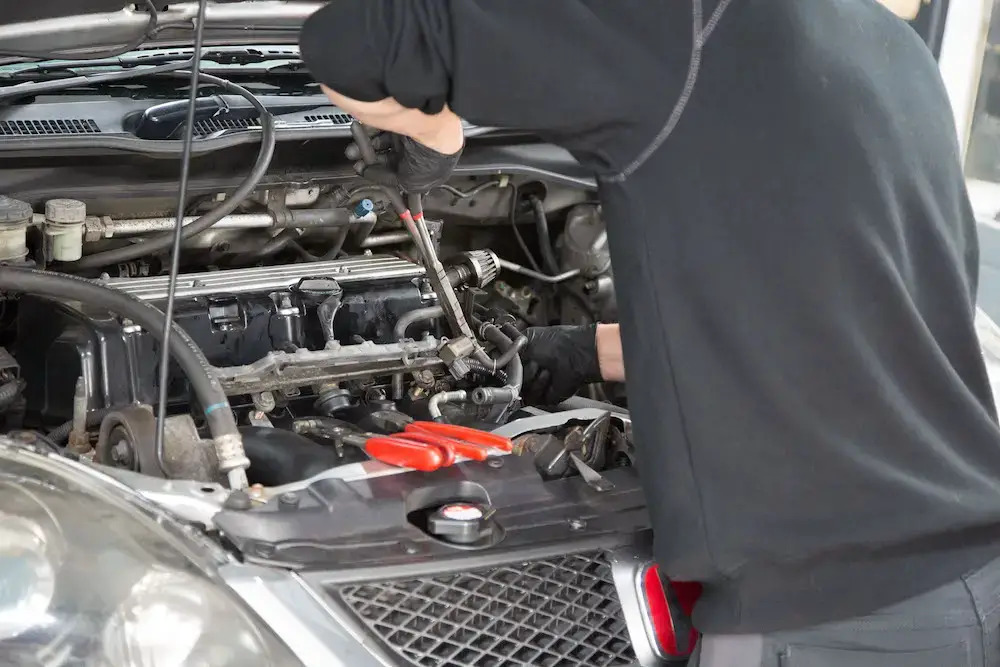
- First, you will need to locate the Evap Canister Vent Solenoid in your vehicle. It is typically located near the fuel tank or under the hood of your car. Once you have located it, you should check for any signs of damage or corrosion that may be present on its exterior. If there are any visible signs of damage or corrosion, then it is likely that this component needs replacing.
- Next, you should check for any loose connections between the solenoid and its wiring harnesses by gently tugging on each connection point with your fingers while inspecting them visually for any signs of wear or tear. If there are any loose connections present then they should be tightened using an appropriate tool such as pliers or wire cutters before proceeding further with diagnosis and repair work.
- Once all connections have been checked and tightened if necessary, you can begin testing the solenoid itself by connecting an ohmmeter across its terminals while activating its switch manually (if applicable). The ohmmeter should read between 0-5 ohms when activated; if not then this indicates that either the solenoid itself has failed or one of its associated wiring harnesses has become damaged/corroded over time which would require a canister purge valve replacement to restore proper operation of this component within your vehicle’s engine system.
- If all tests indicate that both wiring harnesses are intact but still no reading is obtained from an ohmmeter when connected across terminals then it is likely that either: 1) The solenoid itself has failed due to age/wear & tear; 2) There may be an obstruction within its internal valve mechanism preventing proper operation; 3) Its electrical contacts may have become corroded over time causing them not to make contact properly when activated; 4) Its internal coil spring may have become worn out due to excessive use/age resulting in improper operation when activated manually (if applicable). In these cases, replacement would be required for the proper functioning of this component within your vehicle’s engine system once again.
- Finally, once all tests have been completed successfully indicating no faults found with either wiring harnesses or with the solenoid itself then reassembly can begin starting from reconnecting all associated wiring harnesses followed by reinstalling back into place securely using appropriate tools such as wrenches & screwdrivers etc., ensuring all bolts/screws are tightened correctly before finally testing again after reassembly has been completed successfully indicating normal operation once more.
The Benefits of Replacing Your Vehicle’s Evap Canister Vent Solenoid
Replacing your vehicle’s evaporative (EVAP) canister vent solenoid is an important part of maintaining the health and performance of your vehicle. This component helps to regulate the flow of fuel vapors from the EVAP canister to the engine, ensuring that they are burned off safely and efficiently.
Replacing this part regularly can help to improve fuel economy, reduce emissions, and extend the life of your vehicle. The EVAP canister vent solenoid is responsible for controlling the flow of fuel vapors from the EVAP canister into the engine.
When it becomes clogged or damaged, it will not be able to regulate this flow properly, resulting in a decrease in fuel efficiency and an increase in emissions. Replacing this component regularly will ensure that these issues are avoided and that your vehicle runs as efficiently as possible.
In addition to improving fuel economy and reducing emissions, replacing your EVAP canister vent solenoid also helps to extend the life of your vehicle by preventing damage caused by clogged or faulty components. By replacing this part regularly you will be able to avoid costly repairs down the line due to wear-and-tear on other parts caused by a malfunctioning solenoid valve.
Overall, replacing your vehicle’s EVAP canister vent solenoid is an important step toward maintaining its performance and extending its lifespan. By doing so you will be able to enjoy improved fuel economy, reduced emissions levels, and the cost to repair an EVAP system leak down the line due to wear and tear on other parts caused by a malfunctioning valve.
Understanding the Different Types of Evap Canister Vent Solenoids Available
Evap canister vent solenoids are an important component of a vehicle’s evaporative emission control system. They are responsible for controlling the flow of fuel vapors from the fuel tank to the engine, and they play a critical role in reducing emissions and improving fuel economy.
There are several different types of evap canister vent solenoids available on the market today, each with its unique features and benefits:
- The most common type is the two-way solenoid valve. This type of valve has two ports: one for intake and one for exhaust. It is designed to open when pressure builds up inside the canister, allowing vapors to escape into the atmosphere or be drawn into the engine depending on engine demand. This type of valve is typically used in vehicles with carbureted engines or those equipped with an evaporative emission control system (EVAP).
- Another popular option is a three-way solenoid valve. This type has three ports: one for intake, one for exhaust, and one that allows air to bypass both ports when needed. The bypass port helps reduce pressure buildup inside the canister by allowing air to escape without being drawn into either port. Three-way valves are often used in vehicles equipped with electronic fuel injection systems (EFI) as they provide more precise control over vapor flow than two-way valves do.
- Finally, there are also four-way solenoid valves available on the market today which have four ports: two intakes, one exhaust, and one bypass port like a three-way valve does but with an additional intake port that allows more air to enter when needed during high load conditions such as acceleration or climbing hills at higher speeds where more vapor needs to be drawn into the engine.
In conclusion, there are several different types of evap canister vent solenoids available on today’s market that offer varying levels of precision over vapor flow depending on your vehicle’s specific needs and requirements so you must research each option carefully before making your final decision about which type will best suit your particular application.
Tips for Installing an Aftermarket Evap Canister Vent Solenoid in Your Vehicle
1. Read the instructions that come with your aftermarket evap canister vent solenoid carefully before beginning installation. Make sure you understand all of the steps and have all of the necessary tools and supplies on hand.
2. Disconnect the negative battery cable from your vehicle’s battery to prevent any electrical shocks or damage during installation.
3. Locate the existing evaporator vent solenoid in your vehicle, which is usually located near or on top of the fuel tank, and remove it by disconnecting any hoses or wires connected to it.
4. Install your new aftermarket evaporator vent solenoid in place of the old one, making sure to connect all hoses and wires correctly according to manufacturer instructions.
5. Test for proper operation by starting up your engine and checking for any leaks or other issues with performance before driving away in your vehicle safely.
6. Reconnect the negative battery cable once you are finished installing your new aftermarket evap canister vent solenoid, ensuring that it is securely fastened back into place before closing up any panels or compartments you may have opened during the installation process.
Troubleshooting Common Problems with an Evap Canister Vent Solenoid
The evaporative canister vent solenoid is an important component of a vehicle’s evaporative emission control system. It is responsible for controlling the flow of fuel vapors from the fuel tank to the engine. If it malfunctions, it can cause a variety of problems, including poor engine performance and increased emissions.
Fortunately, there are some simple steps you can take to troubleshoot common problems with an evaporative vent solenoid:
- The first step in troubleshooting an evap canister vent solenoid is to check for any visible signs of damage or corrosion on the unit itself. If any damage or corrosion is present, it should be repaired or replaced as soon as possible. Additionally, check all wiring connections and make sure they are secure and free from corrosion or other damage.
- If no visible signs of damage are present, then you should test the electrical circuit that powers the solenoid by using a multimeter set to measure voltage output at 12 volts DC (direct current). If there is no voltage output when testing this circuit, then you may need to replace either the fuse or relay associated with this circuit to restore power to the solenoid.
- If power is restored but still no response from the solenoid when tested with a multimeter set at ohms (resistance), then it may be necessary to replace either its internal coil assembly or its entire housing assembly depending on what type of unit you have installed in your vehicle’s evaporative emission control system.
- Finally, if all else fails and none of these steps have resolved your issue with your evap canister vent solenoid, then it may be necessary for you to contact a qualified technician who specializes in automotive repair services for them to diagnose and repair any underlying issues that could be causing your problem with this component within your vehicle’s evaporative emission control system.
The Pros and Cons of Using an OEM vs Aftermarket Replacement Part
When it comes to replacing parts in your vehicle’s evaporative emission control system (EVAP), you have two main options: OEM (Original Equipment Manufacturer) or aftermarket. Each option has its advantages and disadvantages, so it is important to consider both before making a decision.
- The primary advantage of using an OEM part is that it will be designed specifically for your vehicle’s make and model. This means that the part will fit perfectly and work as intended, without any modifications or adjustments needed. Additionally, OEM parts are often covered by a manufacturer warranty, which can provide peace of mind if something goes wrong with the part down the line.
- On the other hand, aftermarket parts may be more affordable than their OEM counterparts and can offer more variety in terms of design and features. Aftermarket parts are also typically easier to find than OEM ones since they are produced by multiple manufacturers instead of just one company.
- However, there are some drawbacks associated with using aftermarket replacement parts for your EVAP system as well. For example, these parts may not fit as precisely as an OEM part would due to differences in design or manufacturing quality standards between different companies producing them. Additionally, aftermarket replacement parts may not be covered by a warranty like an OEM part would be if something goes wrong with them down the line.
Ultimately, when deciding between an OEM vs aftermarket replacement part for your EVAP system it is important to weigh all of these pros and cons carefully before making a decision that best suits your needs and budget requirements.
What You Need to Know Before Purchasing a New or Used EVAP System Component
When purchasing a new or used EVAP system component, such as an evaporative emission control (EVAP) valve or a vapor purge valve, it is important to consider several factors. First and foremost, you should ensure that the part is compatible with your vehicle’s make and model.
It is also important to check the condition of the part before making a purchase. If possible, inspect the part in person to ensure that it is free from any visible damage or corrosion. Additionally, you should research the manufacturer of the component to determine if they have a good reputation for producing quality parts.
It is also important to consider whether you are purchasing an OEM (original equipment manufacturer) part or an aftermarket replacement part. OEM parts are designed specifically for your vehicle’s make and model and may be more expensive than aftermarket replacements; however, they may offer better performance and reliability than generic aftermarket components.
Finally, when purchasing an EVAP system component such as an EVAP valve or vapor purge valve, it is essential to read all instructions carefully before installation to avoid any potential problems during the operation of your vehicle’s emissions control system.